Image Map

sobota, 29 września 2018

Cracked frame with video tutorial - for Lindy's Gang

Hello,

today I have for you my new project for the Lindy’s Blog. This time it is something vintage an “old treasure”. I made it on a really cheap and simple frame, you don’t need any special things. You can also use a back of the canvas.


You didn’t find here many embellishments. Only few resin castings and a metal net. The main thing is these beautiful cracks. I used white crackle paste to achieve this amazing structure. When it dries, I 
added few Lindy’s colors, to highlights all the cracks and give my project a little bit of shine.


Please feel free to inspire with my video tutorial! :)


Lindy’s supplies:


czwartek, 20 września 2018

Inventor tags - for Retro Kraft Shop

Witajcie!
Dzisiaj mam dwa tagi, które powstały bardzo spontanicznie na pewnym kreatywnym spotkaniu. Literki, które tutaj widzicie, wycięłam z grubej tektury wykrojnikiem Sizzix - Word Play Alphabet. Wykorzystałam również "resztki", powstało z nich świetne tło. Po naklejeniu tekturek na tagi, pokryłam całość białym gesso i dopiero wtedy nałożyłam kolory. Użyłam do tego głównie tuszy Distress Oxide i czarnego tuszu Archival. Niebieski tag psiknęłam również mgiełką Lindy's, a do obu dodałam trochę blasku za pomocą wosku metalicznego Art Alchemy.

Hello!
Today I have two tags that were created very spontaneously at a creative meeting. The letters you see here, I cut from a thick cardboard with the Sizzix dies - Word Play Alphabet. I also used "leftovers", they created a great background. After sticking the cardboard on the tags, I covered the whole with white gesso and then put on the colors. I used mainly the Distress Oxide inks and the black Archival ink. I also added Lindy's spray to the blue one and a bit of light to both using Art Alchemy metallique wax.


Tagi są dość skromne i nie mają wielu ozdób. Chciałam, aby głównymi bohaterami były niesamowite stemple Inventor. Pokolorowałam je tuszami oraz markerami Distress, które dają świetny, akwarelowy efekt. Koniecznie odbijcie stemple za pomocą permanentnego tuszu (np. Archival), aby się nie rozmazały podczas kolorowania.

The tags are quite poor and don't have many embellishments. I wanted the main thing to be the amazing Inventor stamps. I colored them with distress inks and markers, that gives a great, watercolor effect. Be sure to make the stamps with a permanent ink (eg Archival) so that they do not smudge during coloring.


Użyłam / I used:

Wykrojnik - Word Play Alphabet - Bigz - Sizzix - PRZEDSPRZEDAŻ Tagi Distress - Tim Holtz - PRZEDSPRZEDAŻ Quote Chips - Tim Holtz Idea-ologyStemple gumowe - Inventor 2 - Tim Holtz - Stampers Anonymous Wosk - Art Alchemy Metallique - Finnabair Tusz Distress Oxide - Vintage Photo - PRZEDSPRZEDAŻTusz Distress Oxide - Tumbled Glass Tusz Distress Oxide - Evergreen Bough Tusz Distress Oxide - Fossilized Amber - PRZEDSPRZEDAŻTusz Distress Oxide - Peeled Paint - PRZEDSPRZEDAŻ Tusz Archival - Jet Black - PRZEDSPRZEDAŻ Klej - Aleene's Always Ready Original Tacky Glue


czwartek, 6 września 2018

Dream - frame with resin castings for Retro Kraft Shop

Hej,
w ramach dzisiejszej inspiracji przygotowałam dla Was projekt pełen moich ulubionych odlewów z żywicy. Równie dobrze możecie też wykorzystać elementy z jakiejkolwiek masy plastycznej. W sklepie znajdziecie mnóstwo pięknych wzorów foremek, na pewno któryś przypadnie wam do gustu. 

Do tej pracy wykorzystałam zwykłą drewnianą ramkę. Najpierw ułożyłam i przykleiłam kompozycję z wybranych elementów, następnie pokryłam ją w kilku miejscach białą pastą pękającą. Jakiej pasty byście nie użyli - najlepiej dać jej spokojnie wyschnąć, pęknięcia będą wtedy na pewno większe i ciekawsze, niż przy użyciu nagrzewnicy. 

Hi,
for today, I have made for you a project full of my favorite resin casts. You may as well use elements from different material. In the store you will find a lot of beautiful molds, you will surely like some of them.

For this artwork, I used a simple wooden frame. First, I arranged and glued the composition from selected elements, then covered it in several places with a white crackle paste. It doesn't matter what paste you choose - it's best to let it dry out easily, then cracks will surely be bigger and more interesting than using a heat tool.


Gdy wszystko dobrze wyschnie, czas dodać odrobinę koloru. Tym razem miałam ochotę na ciemne kolory, częściowo pokryłam więc ramkę czarnym gesso. Dopiero później użyłam mgiełek Lindy's, które dały piękny połysk. 

When everything dries well, it's time to add a little color. This time I wanted dark colors, so I partially covered the frame with black gesso. Then, I used Lindy's sprays, which gave a beautiful shine.


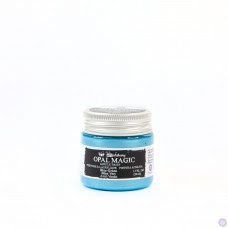
Aby dodać więcej blasku i podkreślić wybrane elementy, użyłam pasty pozłotniczej z Renesansu oraz wosku Finnabair z serii Opal Magic. Jego magia polega na tym, że jasnym miejscom dodaje jedynie blasku, natomiast ciemnym - pięknego koloru.

To add more shine and highlight selected elements, I used a Renesans Goldpaste and Finnabair Art Alchemy wax from the Opal Magic series. Its magic lies in the fact that it adds brightness to bright places, and a beautiful color to the darker.


Użyłam / I used:

Mgiełka - Starburst - Lindy's Stamp Gang - PRZEDSPRZEDAŻ Wosk - Art Alchemy Opal Magic - Finnabair - Prima Pasta pozłotnicza - RenesansForemka Groeneville Crest -  Prima Re-Design Decor Mould Pędzle do tapowania - Dabbing Brushes - Prima - PRZEDSPRZEDAŻ Klej - Aleene's Always Ready Original Tacky Glue


Pozdrawiam!


wtorek, 4 września 2018

Round canvas with nature - video tutorial for Finnabair CT

Hello!
Today I have for you round, romantic canvas made for Finnabair Creative Team. Natural elements reign on my desk lately - such as moss, twigs. So there were some in this project. In my opinion, they combine with all media and paints excellent, and with gesso, they form a perfect combo.


As always, my artwork has lots of layers, details. I wanted a lot to happen. There is a chipboard and gauze here, some papers and, of course, flowers. I like when my project is very spacious. When you can feel all the structures under your fingers, when under the next layers we find an interesting treasure.


In this project, I use new colors from Opal Magi paints. They are beautiful and add an amazing glow. As icing on the cake, I added a great new art pebbles - Vintage. They are in splendid, warm colors and I have a feeling that they fit anywhere and anytime. 


Please enjoy my video tutorial :)


I used: